Every case has its own workspace. Open it from Projects if you are a dentist, or from Jobs if you are a designer, and everything to do with that case is on one screen.
The layout
There is a rail down the left and a set of tabs on the right.
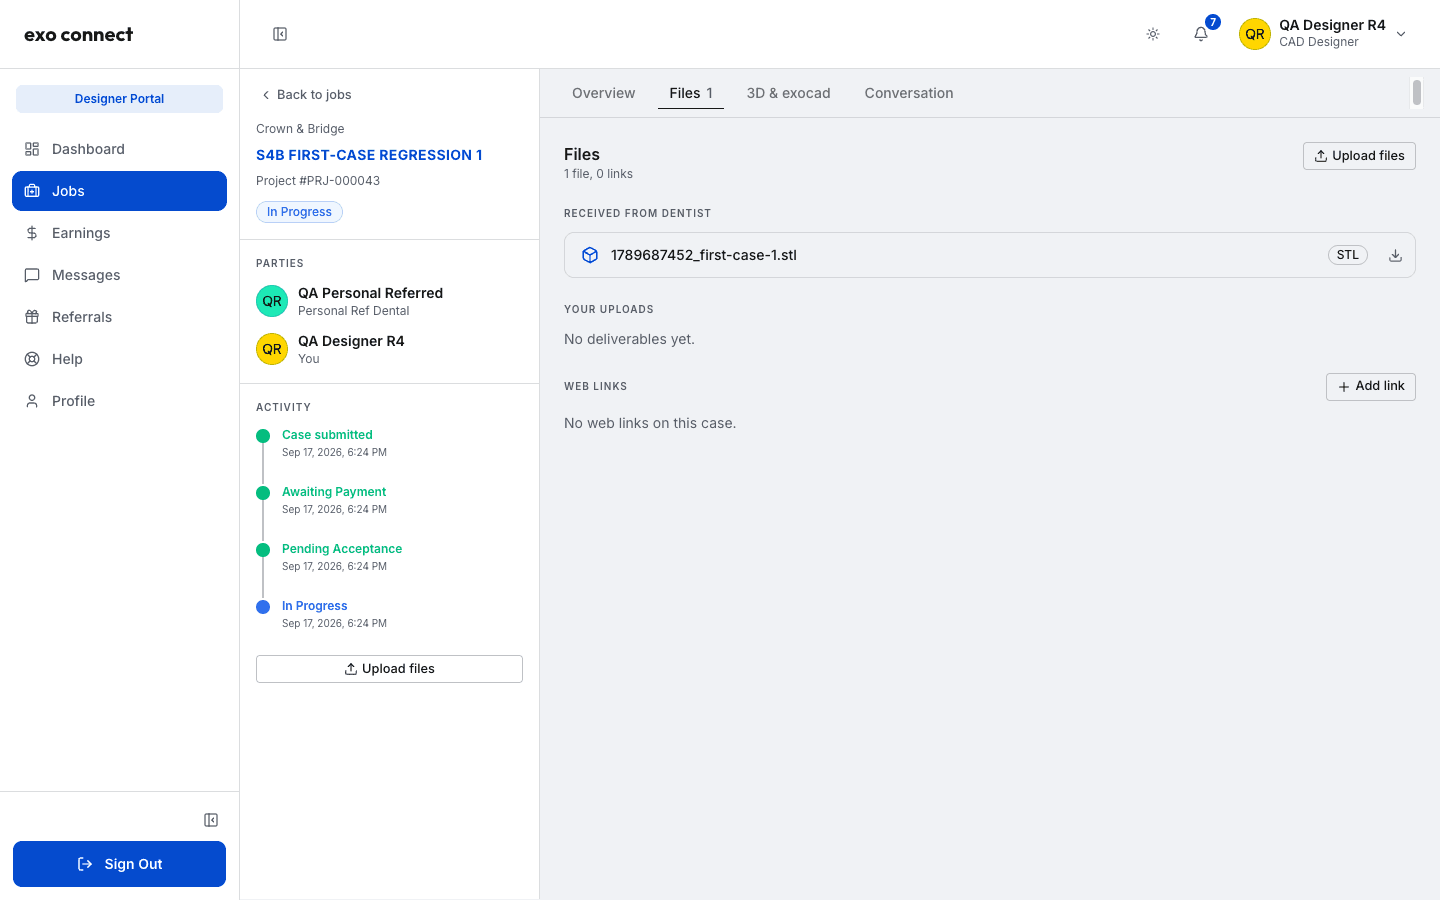
The left rail has two modes. It starts in case mode: the service, the case title, the project number, the status pill, who is on the case, the activity timeline, and whatever actions you can take. Open a file and the rail flips to a compact file list so you can jump between files without losing the preview. Back to case returns it.
The tabs on the right are Overview, Files, 3D & exocad, and Conversation.
If the sidebar for the whole portal is in your way, the collapse control at the bottom of the menu (or the matching icon in the page header) shrinks it to icons and gives the workspace more room.
Overview
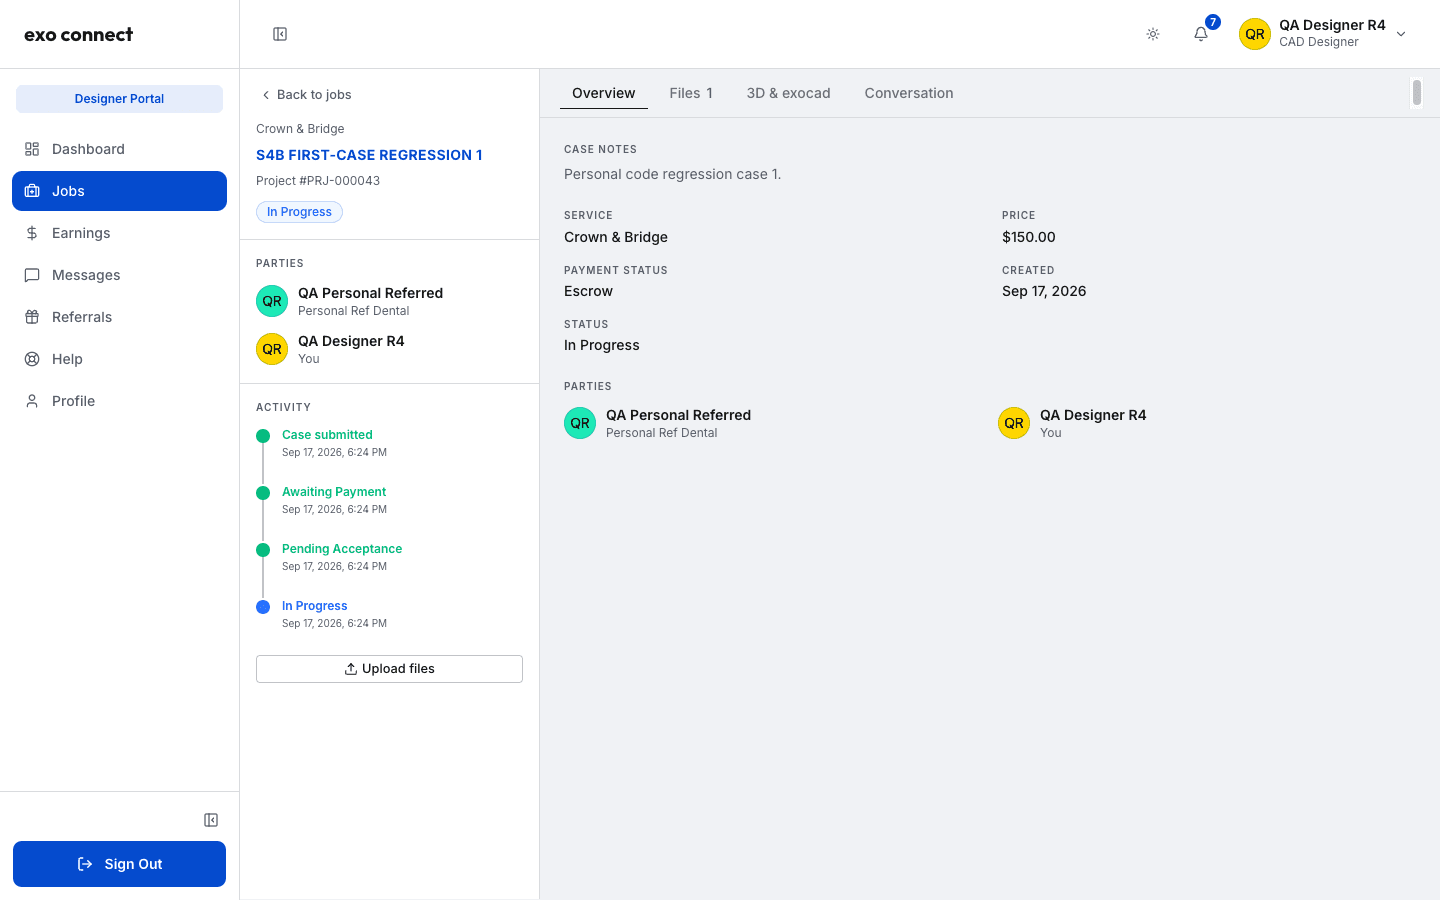
Overview is the summary: the case notes, the service, the price, the payment status, the date it was created, the current status, and both parties.
Files
The Files tab groups everything into three sections.
The scan files the dentist sent. A dentist sees these as "Your scan files"; a designer sees "Received from dentist".
The deliverables from the designer. A dentist sees "Designer submitted"; a designer sees "Your uploads".
And web links attached to the case.
Every file row has a download icon on the right. Click the file name instead and it opens in the preview. Link rows have an "open in a new tab" icon and a remove icon.
Previewing a file
The preview handles most of what turns up on a case:
- Images (PNG, JPG, WEBP) show inline.
- 3D meshes (STL, PLY, OBJ) open in the 3D viewer, which you can spin and zoom.
- PDFs open in the page.
- Web links load right there in the case.
Anything else gives you a download button instead of a broken preview.
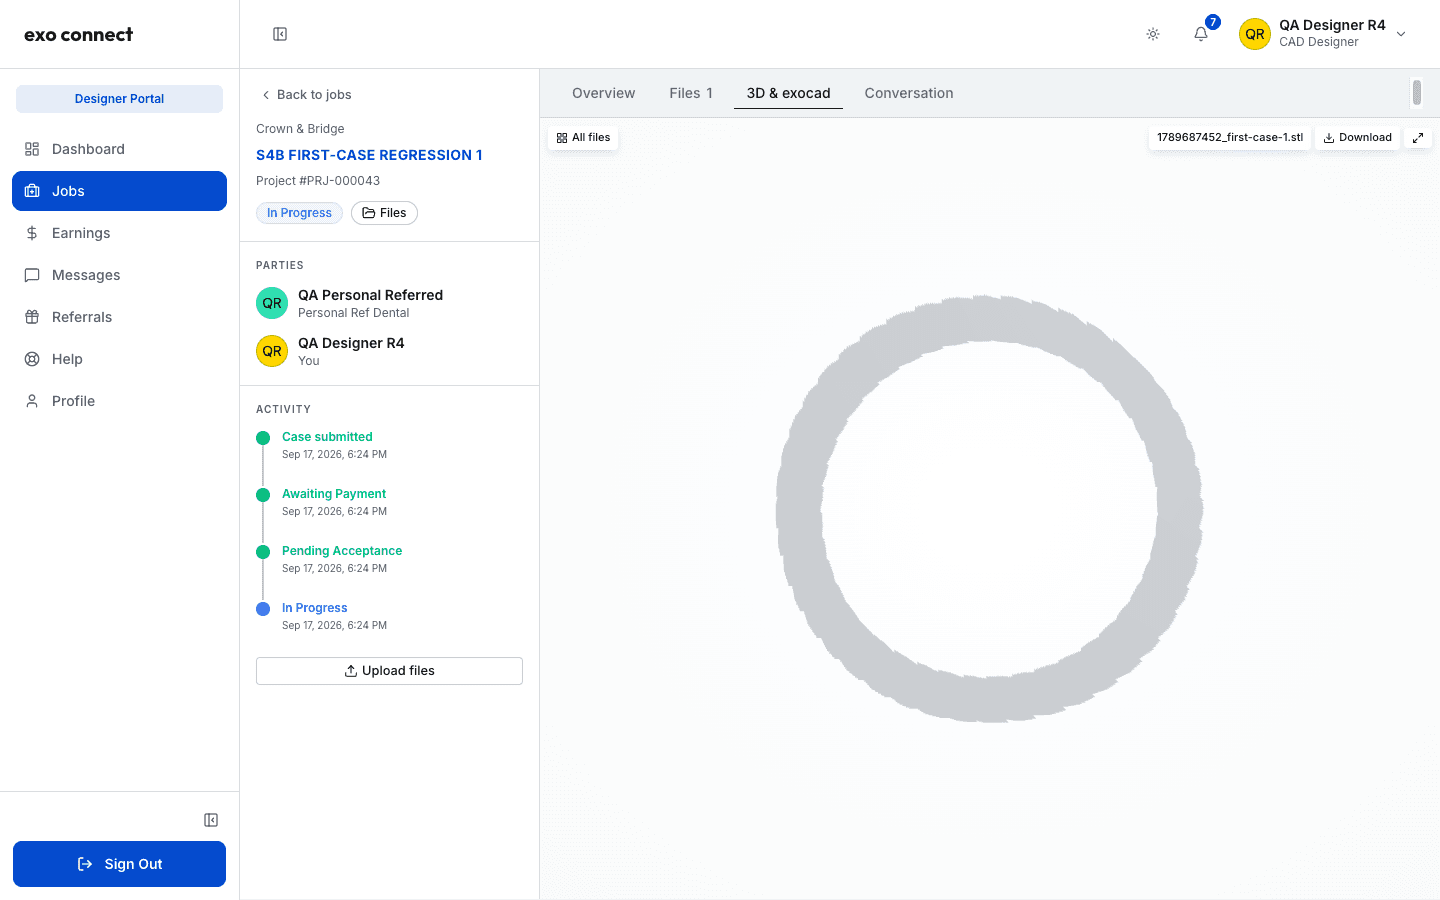
While something is open you get a few controls. Top left is All files, which drops the preview and puts the full file list back. Top right is the file name, a Download link, and a fullscreen button.
Fullscreen is worth knowing. Press F to expand, Esc to come back, and the left and right arrow keys to step through every file and link on the case without leaving fullscreen. There are arrow buttons on either side of the preview too.
If your browser cannot start WebGL, the 3D viewer tells you so and offers the file as a download instead. Turning on hardware acceleration in your browser settings usually sorts it.
3D & exocad
This tab is the same viewer, filtered down to just the things you would want a big view of: the mesh files and every web link on the case. Open it and it picks your exocad link first, or the first mesh if there is no link.
Attaching an exocad web link
Both sides can attach a web link, which is how an exocad webview gets reviewed inside the case instead of over email.
Click Add link in the Web links section (it is in the file rail too), paste the full address, and add a label if you want one.
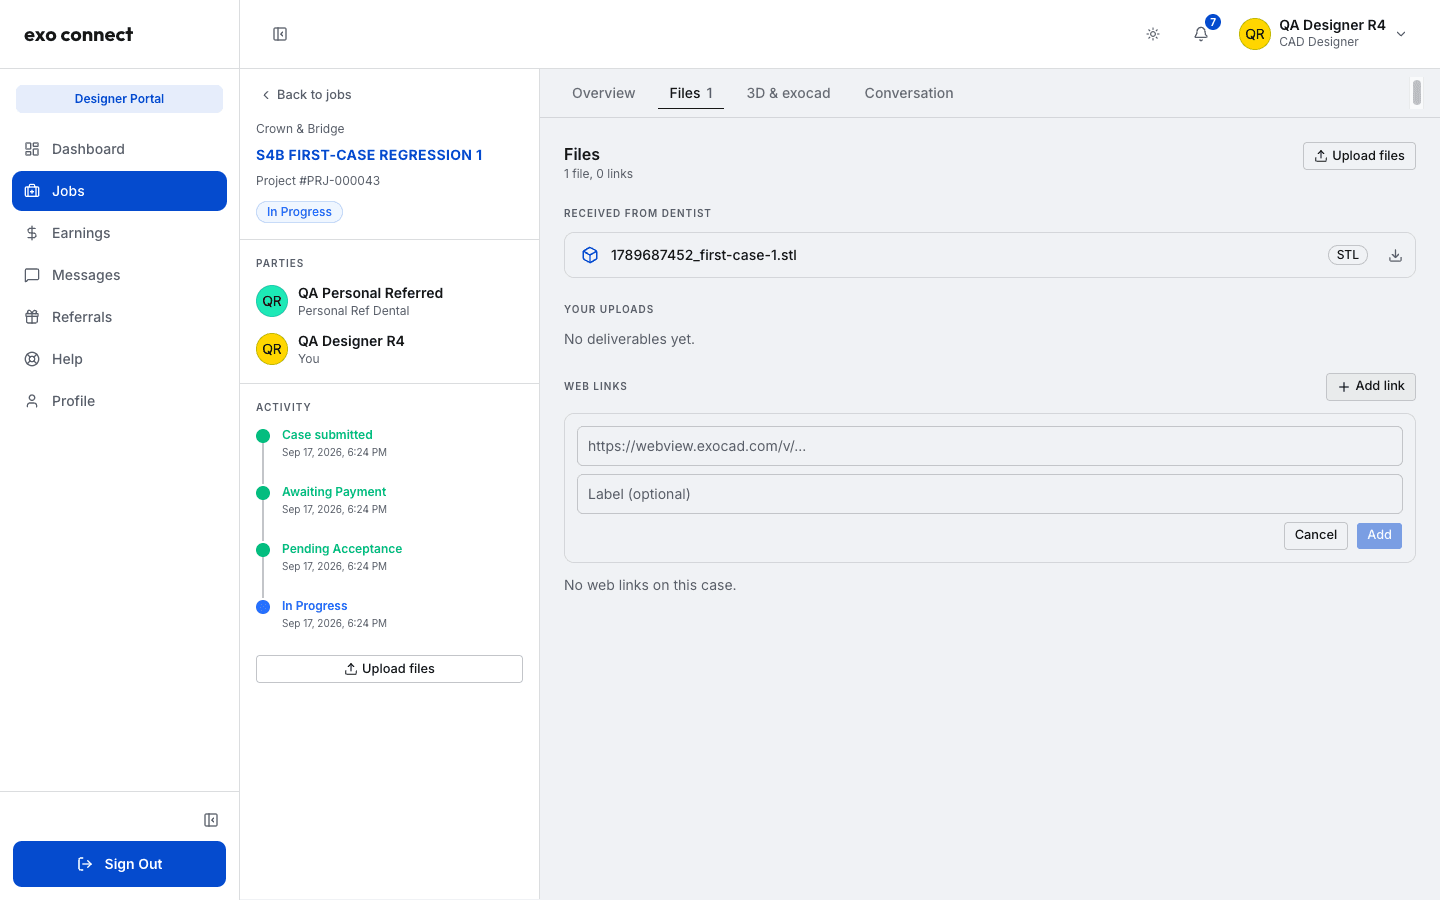
It has to be a complete https:// address. If it is not, the form says so and the Add button stays off. Once it is added, click it in the file list and the page loads inside the case. There is an "Open in new tab" control if you would rather have it full size.
An exocad webview can take fifteen to twenty seconds to paint. The spinner means it is still loading, not that it is broken.
Conversation
The Conversation tab is your chat with the other person on the case, in the case, so nothing has to go to email and nothing gets lost between cases.
If a designer has not been assigned yet, the tab tells you so rather than showing you an empty box.
What you can do
The buttons in the left rail depend on who you are and where the case has got to.
If you are the dentist, once the designer has handed work in you get:
- Accept Design & Complete - you rate the designer out of 5 and leave a review, then confirm. The rating is required. This closes the case and releases the designer's share.
- Send Revision - write what needs changing and send it back. The case reopens for the designer.
- Dispute Case - available for the whole active stretch of a case. Describe the problem and our admin team takes it from there.
If you are the designer, while the case is with you there is a single Upload files button. Drop your deliverables in, wait for them to finish, and click Submit Files. That attaches them and moves the case to Submitted, which is what tells the dentist to take a look.
The activity timeline
Down the left, under Activity, is the case history: when it was submitted and every status it has passed through since, each with a date and time.
It only ever shows what actually happened, so it is the quickest way to answer "where is this case and when did it get there?".